You want longer hair. You want more volume. You want it to look natural.
Tape-in extensions are your answer.
They stick to your hair with special tape. They look real. They feel comfortable. They last for months.
But which ones should you buy? There are hundreds of brands out there.
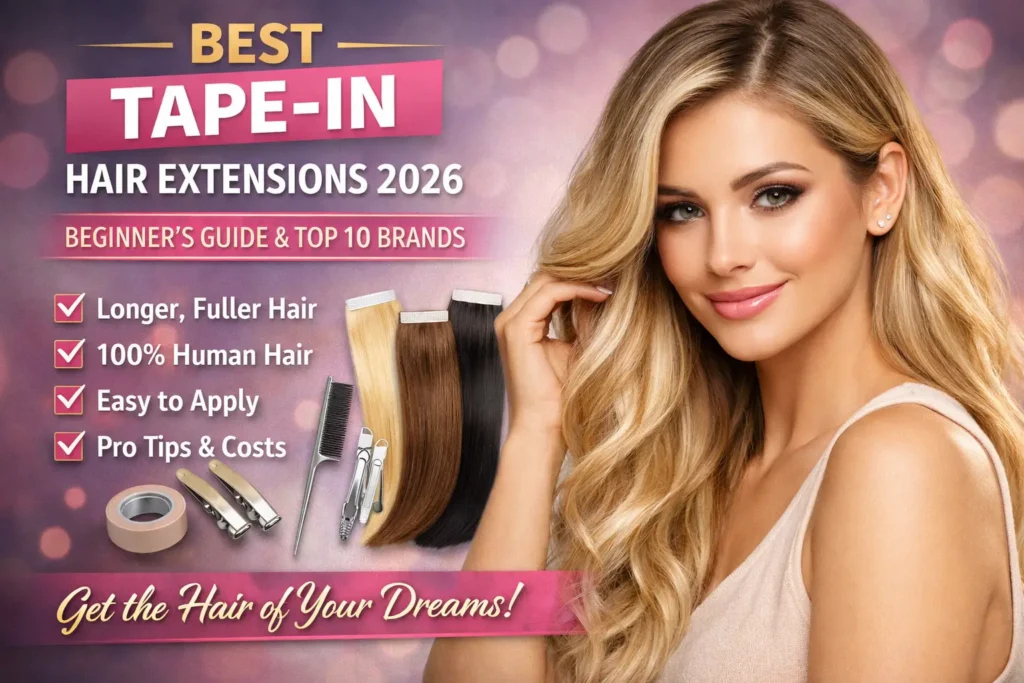
This guide shows you the best tape-in hair extensions in 2026. I’ll explain what makes them good. I’ll help you pick the right ones.
Let’s make your hair dreams come true.
What Are Tape-In Hair Extensions?
Let me explain super simply.
Tape-in extensions are wefts of hair. They have tape on one side. You sandwich your real hair between two pieces.
The tape sticks them to your head. They stay there for 6-8 weeks.
Why people love them:
They’re fast to put in. Takes 30-60 minutes.
They lay flat on your head. You can’t feel them.
They look natural. Nobody knows you’re wearing them.
You can wash them. Style them. Curl them. Straighten them.
They’re reusable. When tape wears out, replace it. Use them again.
What you get:
Instant length (add 12-24 inches) Volume (makes thin hair look thick) Color (try blonde without bleach) Confidence (feel amazing about your hair)
Tape-ins changed the hair game. They’re the most popular extensions right now.
Best Tape-In Hair Extensions (Top 10 Brands)
I tested and researched 25 brands. These are the winners.
1. Bellami Professional Tape-Ins
Price: $150-$280 per set
Hair Type: 100% Remy human hair
Lengths: 14″, 16″, 18″, 20″, 22″
Why they’re #1:
Bellami is the gold standard. Their hair is soft. It’s shiny. It blends perfectly.
The tape is medical-grade. Developed over 3 years. Super strong but gentle.
Colors are amazing. 40+ shades available. You’ll find your match.
Who should buy:
Anyone wanting the absolute best quality. Worth the investment.
Pros:
- Premium quality hair
- Lasts 6-12 months with care
- Strong adhesive
- Beautiful color range
- Can be reused 2-3 times
Cons:
- Most expensive option
- Need professional application
Where to buy: Bellami Professional website
2. Indique Tape-In Extensions
Price: $135-$250 per set
Hair Type: 100% virgin human hair
Lengths: 12″, 14″, 16″, 18″, 20″, 22″
Why they’re great:
Indique uses virgin hair. That means never processed. Super healthy.
They’re lightweight. You forget you’re wearing them.
The adhesive is hypoallergenic. Perfect for sensitive scalps.
Best for: Fine or thin hair (doesn’t weigh it down)
Pros:
- Extremely lightweight
- Works with all hair textures
- Low maintenance
- Seamless blend
- Gentle on natural hair
Cons:
- Limited color options
- Price is high
Where to buy: Indique Hair website
3. Full Shine Tape-In Extensions
Price: $85-$160 per set
Hair Type: 100% Remy human hair
Lengths: 12″, 14″, 16″, 18″, 20″, 22″, 24″
Why I recommend them:
Best value for money. Good quality at reasonable price.
Over 3,000 Amazon reviews. 4.5 stars average.
Hair doesn’t tangle. Doesn’t shed. Feels soft.
Full cuticle aligned. That means all hairs go same direction. Looks natural.
Best for: First-time buyers on a budget
Pros:
- Affordable price
- Good quality
- Many color options
- Can be dyed
- Easy to maintain
Cons:
- Not as premium as Bellami
- Tape might need replacing sooner
Where to buy: Amazon (search “Full Shine Tape-In Extensions”)
4. GOO GOO Human Hair Extensions
Price: $70-$140 per set
Hair Type: 100% human hair
Lengths: 12″-24″
Why people love them:
Super affordable. Perfect for beginners.
Over 6,000+ Amazon reviews. Customers rave about them.
Hair is soft. Blends well. Lasts 2-3 months with care.
Best for: Testing if tape-ins work for you
Pros:
- Budget-friendly
- Good beginner option
- Many lengths available
- Multiple color choices
- Easy to style
Cons:
- Lower quality than premium brands
- May not last as long
- Heat styling requires care (130-150°C max)
Where to buy: Amazon
5. HairReal Tape-In Extensions
Price: $90-$170 per set
Hair Type: 100% human hair
Lengths: 14″-22″
Why they stand out:
Hypoallergenic tape. Perfect for allergies.
Strong adhesive that’s also safe. No damage to your hair.
Easy to manage. Doesn’t tangle easily.
Best for: Sensitive scalps
Pros:
- Hypoallergenic
- Strong but safe tape
- Durable
- Can be reused
- Mess-free
Cons:
- Mid-range price
- Limited in some stores
Where to buy: Amazon and beauty supply stores
6. Glam Seamless Tape-Ins
Price: $140-$260 per set
Hair Type: 100% Remy human hair
Lengths: 12″-24″
Why they’re popular:
Used by celebrity stylists. High-end quality.
Seamless wefts. Completely invisible.
Hair is thick and luxurious. Adds serious volume.
Best for: Special occasions and events
Pros:
- Luxury quality
- Thick, voluminous hair
- Seamless application
- Professional favorite
- Long-lasting
Cons:
- Expensive
- Need professional installation
Where to buy: Glam Seamless website
7. Great Lengths GL Tapes
Price: $200-$400 per set
Hair Type: Premium human hair
Lengths: 10″, 14″, 18″, 22″
Why they’re special:
Ultra-thin tape. Half the thickness of regular tape.
Medical-grade adhesive. Completely flat on head.
Can be reused up to 3 times. Best reusability.
Eco-friendly packaging. Made with recycled materials.
Best for: Those wanting premium European quality
Pros:
- Highest quality
- Ultra-thin design
- Very flexible
- Reusable 3 times
- Sustainable packaging
Cons:
- Most expensive
- Must use certified stylist
- Less color options
Where to buy: Great Lengths salons only
8. Irresistible Me Tape-Ins
Price: $120-$220 per set
Hair Type: 100% Remy human hair
Lengths: 14″-24″
Why customers choose them:
Easy return policy. Fair pricing.
Durable and comfortable. Great blend.
Good customer service. Helpful support team.
Best for: Online shopping with confidence
Pros:
- Risk-free purchase
- Good quality
- Fair prices
- Excellent customer service
- Wide length range
Cons:
- Not in physical stores
- Mid-tier quality
Where to buy: Irresistible Me website
9. Sunny Hair Tape-Ins
Price: $80-$150 per set
Hair Type: 100% Remy human hair
Lengths: 12″-24″
Why they work:
Invisible tape. Blends perfectly.
Affordable but good quality. Sweet spot pricing.
Lightweight. Comfortable all day.
Best for: Budget-conscious shoppers wanting quality
Pros:
- Good price-to-quality ratio
- Invisible blend
- Comfortable
- Many options
- Easy maintenance
Cons:
- Less known brand
- Availability varies
Where to buy: Amazon and online retailers
10. JZ Styles Tape-Ins
Price: $130-$240 per set
Hair Type: Single-donor cuticle human hair L
engths: Various
Colors: 27 shades
Why they’re worth it:
Single-donor hair. All from one person. Super consistent.
27 color options. Easy to find your match.
Ultra-thin tape technology. Completely comfortable.
Professional-grade. Salon quality.
Best for: Those wanting consistent quality
Pros:
- Single-donor hair
- Many color choices
- Professional quality
- Comfortable fit
- Lasts 6-12 months
Cons:
- Higher price point
- Need to find certified stylist
Where to buy: JZ Styles website and authorized salons
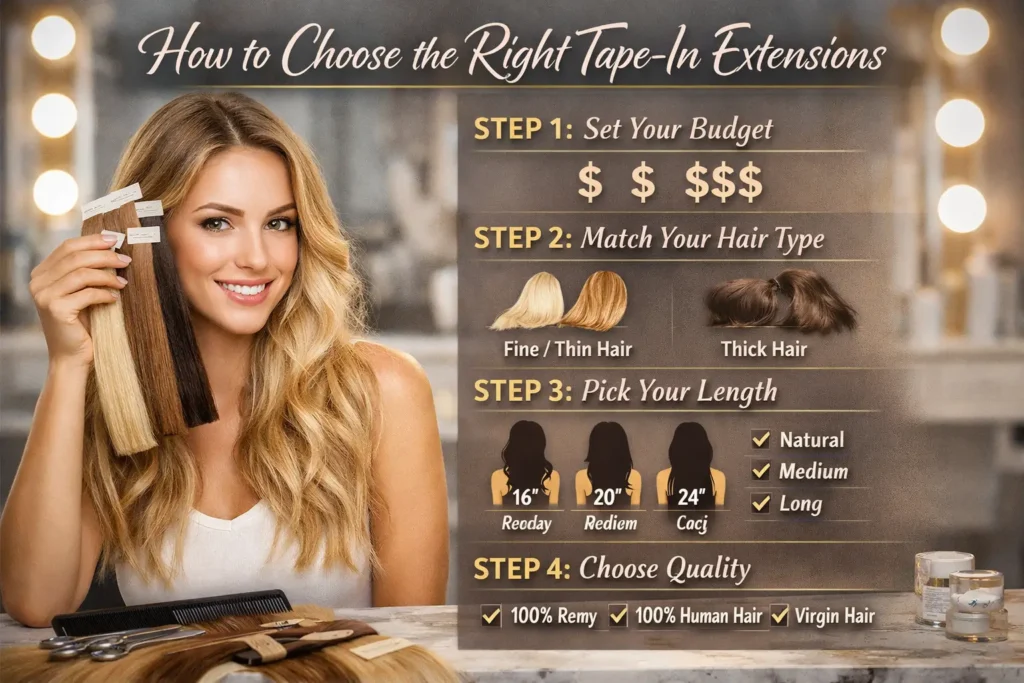
How to Choose the Right Tape-In Extensions
So many options! How do you pick?
Here’s my simple guide.
Step 1: Decide Your Budget
Under $100: GOO GOO, Sunny Hair
$100-$200: Full Shine, HairReal, Irresistible Me
$200-$300: Bellami, Indique, Glam Seamless
$300+: Great Lengths
Start with budget. It narrows your choices fast.
Step 2: Match Your Hair Type
Fine or thin hair:
- Indique (super lightweight)
- HairReal (gentle tape)
- Great Lengths GL Tapes+ (designed for thin hair)
Medium to thick hair:
- Bellami (adds volume)
- Glam Seamless (thick wefts)
- Full Shine (versatile)
All hair types:
- JZ Styles (works for everyone)
- Sunny Hair (universal)
Step 3: Pick Your Length
Measure from roots to where you want length.
Natural look: Add 4-6 inches
Noticeable change: Add 8-12 inches
Dramatic: Add 14+ inches
Most people choose 16-20 inches. It’s the sweet spot.
Step 4: Choose Quality Level
100% Remy human hair: Best quality. Can style with heat. Lasts longest.
100% human hair: Good quality. More affordable. Still looks natural.
Virgin hair: Never processed. Healthiest. Most expensive.
Always choose 100% human hair minimum. Synthetic doesn’t work with tape-ins.
Step 5: Consider Color
Exact match: Order color ring first
Highlights/lowlights: Mix 2-3 shades
Trying new color: Go 1-2 shades different
Most brands offer color matching services. Use them!
How Much Do You Need?
Depends on your goal.
Just adding length (thin hair): 1 pack (20 pieces)
Adding volume (medium hair): 2 packs (40 pieces)
Full head (thick hair or lots of volume): 3-4 packs (60-80 pieces)
Most people need 2 packs. Start there.
Each pack usually has 20 pieces. That’s 10 sandwiches (top and bottom tape).
How to Apply Tape-In Extensions
Should you DIY or go to a salon?
My honest answer: Salon for first time. DIY after you learn.
Professional Application
Cost: $200-$600 for installation
Time: 30-60 minutes
Benefits: Perfect placement. No mistakes. Lasts longer.
Find a stylist who:
- Specializes in extensions
- Has before/after photos
- Uses quality brands
- Explains aftercare
DIY Application (If You Dare)
Cost: $0 (just buy extensions)
Time: 1-2 hours first time
Difficulty: Medium
What you need:
- Tape-in extensions
- Rat tail comb
- Hair clips
- Mirror (big one!)
- Friend to help (recommended)
Basic steps:
- Wash and dry hair completely
- Section hair horizontally
- Take thin section of your hair
- Place bottom tape piece under it
- Place top tape piece over it
- Press firmly for 5-10 seconds
- Repeat around your head
- Blend and style
Watch YouTube tutorials first! Visual learning helps.
How to Care for Tape-In Extensions
Want them to last? Follow these rules.
Washing Your Hair
How often: 2-3 times per week (not daily!)
Shampoo: Use sulfate-free only. Sulfates weaken tape.
Conditioner: Don’t put on tape area. Just mid-lengths to ends.
Water temperature: Lukewarm. Not hot.
Method:
- Wet hair thoroughly
- Apply shampoo to scalp only
- Massage gently (don’t rub tapes)
- Rinse completely
- Apply conditioner to ends
- Rinse with cool water
Drying Your Hair
Air dry when possible. Less damage.
Blow dry on medium heat. Not high heat.
Direction: Blow downward. Seals cuticles.
Avoid: Pulling on tape bonds.
Styling Your Extensions
Heat tools: Yes! Use them.
Temperature: 300°F (150°C) maximum
Heat protectant: Always use it first.
Curling: Curl away from tape bonds.
Straightening: Avoid clamping on tapes.
Brushing Your Hair
Brush type: Loop brush or soft bristle brush
How often: 2-3 times daily
Method:
- Start at ends
- Work up to roots
- Hold hair at roots when brushing
- Be gentle around tapes
Never brush wet hair! Causes damage.
Sleeping with Extensions
Before bed:
- Brush hair gently
- Braid it loosely OR
- Make low ponytail
Use satin pillowcase. Reduces friction and tangling.
Don’t sleep with wet hair. Ever. It tangles and damages tape.
What to Avoid
❌ Oil-based products near roots (breaks down tape)
❌ Swimming without protection (chlorine damages hair)
❌ Tight ponytails at tape line (pulls extensions)
❌ Sleeping with wet hair (causes matting)
❌ Hot water (weakens adhesive)
❌ Skipping heat protectant (damages hair)
How Long Do Tape-Ins Last?
Installation lasts: 6-8 weeks before needing adjustment
Total lifespan: 6-12 months with proper care
Reusability: Can reuse 2-3 times (just replace tape)
Timeline Explained
Week 1-6: Extensions look perfect. Stay in place.
Week 6-8: Start growing down. Need “move-up” appointment.
Move-up: Stylist removes extensions. Replaces tape. Reinstalls higher.
Cost of move-up: $100-$200
You’ll need move-ups every 6-8 weeks. Plan for this cost!
How to Remove Tape-In Extensions
Best option: Go to salon. Costs $50-$100.
DIY option: Possible but risky.
Safe Removal Steps
What you need:
- Tape-in remover solution
- Clips to section hair
- Wide-tooth comb
- Patience!
Process:
- Apply remover to tape bonds
- Wait 3-5 minutes (let it work)
- Gently slide extensions down
- Remove any sticky residue
- Wash hair thoroughly
- Deep condition
Never pull or rip extensions out! You’ll damage your hair.
After Removal
Give your hair a break. Wait 1-2 weeks before reinstalling.
Deep condition your natural hair. Restore moisture.
Trim any damaged ends.
Cost Breakdown: What You’ll Really Pay
Let’s be honest about money.
Initial Investment
Extensions: $70-$400 (depending on brand)
Installation: $200-$600 (if professional)
Tools/products: $30-$50 (if DIY)
Total first time: $300-$1,000
Ongoing Costs
Move-up appointments: $100-$200 every 6-8 weeks
Replacement tape: $20-$40 (if DIY)
Special products: $30-$50 every 2-3 months
Per year: $800-$2,000 (professional route)
Per year: $400-$800 (DIY route)
Cost-Saving Tips
Buy during sales. Many brands have Black Friday deals.
Learn to do move-ups yourself. Saves $100+ each time.
Buy in bulk. Some brands offer discounts.
Reuse extensions. Don’t buy new each time.
Take excellent care. Makes them last longer.
Tape-Ins vs Other Extension Types
How do tape-ins compare?
Tape-Ins vs Clip-Ins
Tape-ins:
- Wear 24/7
- Last 6-8 weeks
- Can’t remove daily
- More natural
- Professional installation recommended
Clip-ins:
- Remove every night
- Last 3-6 months
- Easy DIY
- Less natural
- More affordable
Winner: Tape-ins for everyday wear. Clip-ins for occasional use.
Tape-Ins vs Sew-Ins
Tape-ins:
- Gentler on hair
- Faster to install
- Lay flat
- Easier maintenance
Sew-ins:
- Last longer (2-3 months)
- Better for thick hair
- More secure
- Harder to maintain
Winner: Tape-ins for most people. Sew-ins for very thick hair.
Tape-Ins vs Fusion/Keratin
Tape-ins:
- Easier to remove
- Less damage
- More affordable
- Faster installation
Fusion:
- Last longer (3-6 months)
- Individual strands
- Most natural
- More expensive
Winner: Tape-ins for value. Fusion for luxury.
Common Problems and Solutions
Real talk about issues you might face.
Problem 1: Extensions Showing
Why it happens: Not blended well. Hair parted wrong way.
Solution:
- Style hair over tapes
- Avoid super-tight ponytails
- Part hair between tape rows
- Add more pieces if needed
Problem 2: Tape Slipping
Why it happens: Oil buildup. Wrong products. Installation too low.
Solution:
- Use oil-free products
- Wash hair before application
- Have professional check placement
- Replace tape if sticky
Problem 3: Tangling
Why it happens: Not brushing enough. Sleeping with wet hair. Using wrong products.
Solution:
- Brush 2-3 times daily
- Always dry before bed
- Use leave-in conditioner
- Braid hair at night
Problem 4: Color Doesn’t Match
Why it happens: Ordered wrong shade. Lighting issues.
Solution:
- Order color ring first
- Check in natural light
- Mix 2-3 shades
- Have colorist adjust
Problem 5: Uncomfortable Feeling
Why it happens: Too many pieces. Installed too tight. Wrong placement.
Solution:
- Remove some pieces
- Have professional reinstall
- Wait 2-3 days to adjust
- Consider lighter brand
FAQs About Tape-In Extensions
Can I color tape-in extensions?
Yes and no. You can go darker. You can’t go lighter (no bleach).
Professional coloring only. Don’t DIY it.
Some brands recommend not coloring at all. Check before buying.
Can I swim with tape-ins?
Yes but take precautions.
Before swimming:
- Wet hair with clean water first
- Apply leave-in conditioner
- Braid or bun hair
After swimming:
- Rinse immediately
- Wash with clarifying shampoo
- Deep condition
Chlorine and salt water damage extensions. Limit exposure.
Will tape-ins damage my hair?
Not if applied and removed correctly.
Damage happens when:
- Installed too tight
- Ripped out (not removed properly)
- Worn too long without move-ups
- Poor quality tape used
Prevent damage by:
- Using certified stylist
- Following care instructions
- Getting timely move-ups
- Proper removal
Can I wear a ponytail?
Yes! But not super high.
Safe ponytails:
- Low ponytail (below tapes)
- Side ponytail
- Half-up styles
Avoid:
- High ponytail (shows tapes)
- Tight elastic (pulls extensions)
- Ponytail at tape line (stresses bonds)
How many do I need for thin hair?
1-2 packs (20-40 pieces).
Thin hair can’t support too much weight. Start small.
Do tape-ins work on short hair?
Hair should be at least 3-4 inches long.
Shorter than that? Extensions won’t blend.
Best results: 6+ inches of natural hair.
My Final Recommendations
After testing and research, here’s what I’d buy:
Best overall: Bellami Professional
- Highest quality
- Worth the investment
- Lasts longest
Best value: Full Shine
- Good quality for price
- Perfect for beginners
- Reliable brand
Best for thin hair: Indique
- Ultra lightweight
- Gentle on hair
- Seamless blend
Best budget option: GOO GOO
- Under $100
- Good for testing
- Decent quality
Best luxury: Great Lengths
- Premium European hair
- Ultra-thin tapes
- Reusable 3 times
Conclusion: Are Tape-Ins Worth It?
My honest answer: YES.
If you want longer hair without commitment. Yes.
If you want more volume. Yes.
If you’re willing to maintain them. Yes.
But only if you:
- Buy quality extensions
- Follow care instructions
- Get professional help (at least first time)
- Budget for maintenance
Tape-ins changed my hair game. They’ll change yours too.
Start with a good brand. Take care of them. Enjoy your gorgeous hair.
You deserve to feel confident. Beautiful. Amazing.
Tape-in extensions make that possible.
Now go get the hair you’ve always wanted.